Revit LOD for As-Built Models: 200 vs 300 vs 350
Revit LOD for as-built models usually starts at LOD 300 for most renovation and existing-conditions workflows because major model elements are represented with sufficiently defined geometry for design and coordination. LOD 200…
Revit LOD for as-built models: Quick answer
Revit LOD for as-built models usually starts at LOD 300 for most renovation and existing-conditions workflows because major model elements are represented with sufficiently defined geometry for design and coordination. LOD 200 works when approximate geometry is enough, while LOD 350 becomes useful where interfaces, connections and coordination between systems must be modelled. The correct scope can also mix LOD levels instead of applying one level to the entire building.
Choosing Revit LOD for as-built models is not simply a question of requesting more detail. LOD 200, LOD 300 and LOD 350 represent different levels of model development, and each supports different project decisions. The right choice depends on how architects, engineers, contractors or owners intend to use the scan-based model after the existing conditions survey.
How Revit LOD for as-built models applies to Scan-to-BIM
Level of Development describes how reliably a model element has been developed for a defined use. In practical Scan-to-BIM work, the LOD requirement tells the modeller how far building elements must be developed beyond basic point-cloud tracing. LOD 200 is schematic or approximate, LOD 300 represents more precisely defined elements, and LOD 350 adds interfaces and connections needed for deeper construction coordination.
This distinction matters because an as-built Revit model can serve very different purposes. One project may need a lightweight architectural reference for preliminary design, while another may require coordinated mechanical, electrical and plumbing geometry around congested ceiling spaces. Both projects start from existing conditions, but they should not automatically receive the same modelling scope.
The key LOD decision
Choose the lowest LOD that reliably supports the decisions your team must make. LOD 200 is suitable for approximate spatial understanding, LOD 300 supports detailed design and coordination, and LOD 350 is justified when interfaces between elements affect constructability.
Requesting higher LOD everywhere can increase modelling effort without improving the parts of the project that actually matter. Revit LOD for as-built models should therefore follow the intended use of the model rather than maximum detail.
LOD is not the same as simply adding more geometry
LOD progression should reflect the intended reliability and use of modelled elements, not a visual preference for a more complicated model. A model can contain many visible objects and still be poorly scoped for coordination. Conversely, a carefully defined LOD 300 model can be more useful than a heavily modelled file if the latter includes information that the design team does not need.
Revit LOD for as-built models: LOD 200 vs LOD 300 vs LOD 350
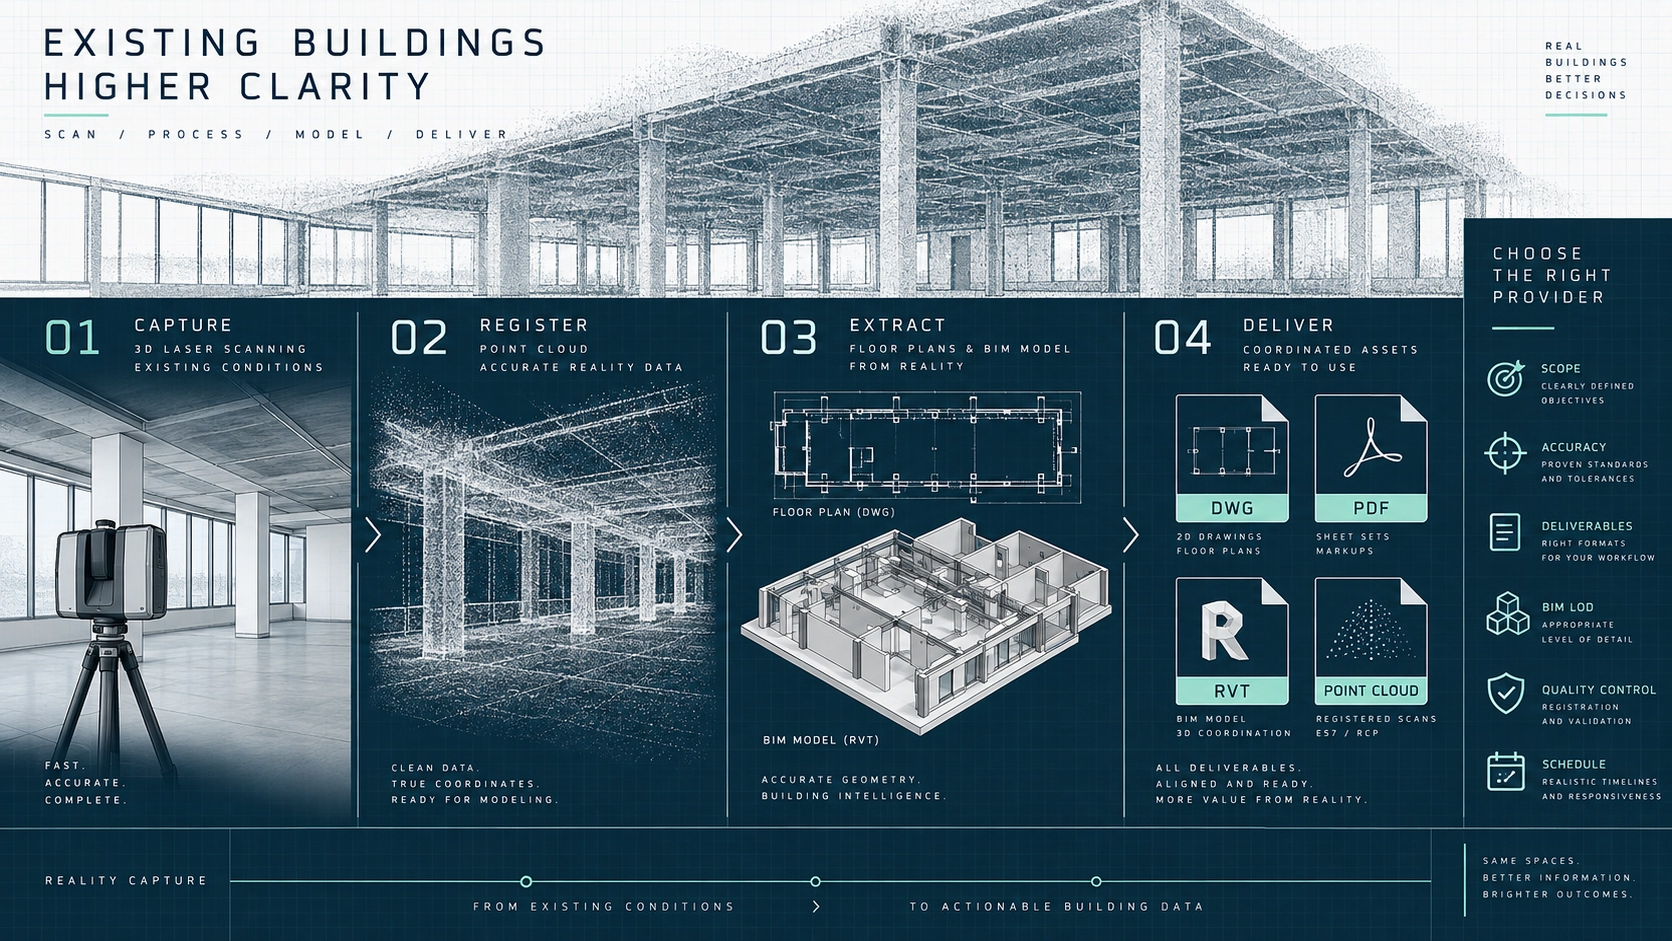
The practical difference between LOD 200, 300 and 350 is the degree to which model geometry can support downstream decisions. LOD 200 communicates approximate building elements. LOD 300 develops elements with more defined geometry. LOD 350 goes further by representing how elements interface with other systems or components.
| LOD | Typical model character | Best suited to | Key limitation |
|---|---|---|---|
| LOD 200 | Approximate or generic geometry representing major elements | Early planning, broad spatial studies, preliminary existing-condition reference | Not intended for detailed interface or construction coordination |
| LOD 300 | More precisely defined element geometry suitable for measured documentation | Renovation design, architectural coordination, documentation and many Scan-to-BIM workflows | Connections and interfaces between systems may remain outside the scope |
| LOD 350 | LOD 300 geometry plus relevant interfaces, connections and coordination conditions | MEP coordination, congested technical areas and construction-focused coordination | Additional modelling effort may provide little value outside coordination-critical zones |
In short: Revit LOD for as-built models is often best balanced at LOD 300 for an existing-condition Revit model. Move to LOD 350 when the project depends on understanding how systems connect, intersect or interface with surrounding construction.
When LOD 200 is the right choice
LOD 200 works when the project needs an organized BIM representation of existing conditions without detailed development of every component. Elements can be represented schematically or with generic geometry, making this level appropriate where spatial relationships matter more than construction-level interfaces.
Typical LOD 200 use cases
- Early renovation feasibility studies where teams need overall rooms, walls, floors and major building volumes.
- Concept design workflows where existing-condition geometry provides context but detailed coordination has not started.
- Large facilities where only selected architectural or technical zones require deeper modelling.
- Projects using the Revit model mainly as a visual and spatial reference rather than a construction coordination model.
LOD 200 can also be useful as one layer within a mixed-scope model. For example, architecture that is not being modified may remain at LOD 200 while mechanical rooms or renovation zones are developed further. This approach keeps modelling effort aligned with project risk rather than treating every object equally.
LOD 200 becomes less suitable when designers need dependable element geometry for detailed renovation decisions or when contractors must coordinate interfaces between trades. In those cases, the model usually needs to progress to LOD 300 or selectively to LOD 350.
Why LOD 300 is often the practical default for Revit LOD for as-built models
LOD 300 is commonly suited to renovation and existing-condition documentation because model elements are developed beyond schematic representation into more clearly defined geometry. For architects and designers, this creates a stronger base for producing plans, elevations, sections and coordinated design views without automatically modelling every connection.
A Scan-to-BIM LOD 300 model can support teams that need usable Revit geometry derived from measured building conditions. Architectural elements such as walls, floors, openings, ceilings and other scoped components can be developed as defined model objects rather than approximate masses or generic placeholders. This is why Revit LOD for as-built models frequently centres on LOD 300 for architectural renovation workflows.
Where LOD 300 provides the most value
- Architectural renovation and retrofit design based on existing conditions.
- Commercial tenant improvement projects requiring dependable base-building documentation.
- Interior design workflows that need coordinated floor plans, elevations, sections or reflected ceiling information.
- Existing-building BIM documentation where editable Revit geometry is more useful than a point cloud alone.
- Projects where architectural coordination is important but detailed system connections are not yet required.
- Intended use: Confirm that the model will support design, documentation or coordination rather than fabrication-level decisions.
- Elements included: Define which architectural, structural and MEP elements must be modelled instead of assuming the same treatment for every object.
- Deliverables: Specify whether the project requires RVT, DWG, PDF, point cloud data or a combination.
- Views required: Identify whether floor plans, elevations, sections or reflected ceiling plans must be generated from the model.
- Critical areas: Flag technical rooms, ceiling spaces and renovation zones that may need development beyond LOD 300.
When LOD 350 requirements become necessary
LOD 350 becomes relevant when coordination depends on interfaces between building elements. The step from LOD 300 to LOD 350 is not simply a visual upgrade. The model begins to represent relationships such as connections, supports or other interface conditions that affect how adjacent systems can be coordinated.
MEP coordination and congested technical spaces
Mechanical, electrical and plumbing coordination is one of the clearest reasons to specify LOD 350. In dense plant rooms, service corridors, raised-floor zones or ceiling spaces, the project team may need more than the centreline or approximate envelope of a service. Supports, penetrations, connections and interfaces can determine whether proposed work can physically coexist with existing systems.
Construction-focused coordination
LOD 350 is also useful when contractors and consultants must understand how modelled elements relate at construction interfaces. The additional development can make coordination more actionable because conflicts are evaluated against the components and relationships that matter to installation, not only against simplified geometry.
- Complex MEP retrofit zones where existing services constrain new routing.
- Industrial renovations with dense technical systems and limited available space.
- Areas where supports, penetrations or system connections influence constructability.
- Project zones requiring detailed multidisciplinary coordination before construction documentation is finalized.
In short: LOD 350 should be tied to coordination risk. If interfaces between elements do not affect a project decision, modelling those interfaces everywhere may add effort without improving the deliverable. Revit LOD for as-built models can therefore use LOD 350 selectively rather than across the entire building.
Why a mixed LOD strategy can be more efficient
A single LOD does not have to apply uniformly to an entire existing building. A mixed LOD strategy can assign different development requirements to architecture, structure, MEP systems and individual zones according to their project importance. This is especially useful for renovations where only a portion of the building is being altered.
For example, an architectural shell may be adequate at LOD 300 while a congested mechanical room is developed to LOD 350. Secondary spaces outside the renovation area may require only LOD 200. The result is a model specification based on intended use instead of a blanket requirement for maximum development.
| Project area | Possible LOD approach | Reason |
|---|---|---|
| Unmodified background areas | LOD 200 | Provides spatial context without unnecessary modelling depth |
| Primary architectural renovation zone | LOD 300 | Supports defined geometry for design and documentation |
| Congested MEP or technical room | LOD 350 | Adds interfaces and connections needed for coordination |
| Selected critical interfaces | LOD 350 | Focuses modelling effort where constructability depends on element relationships |
This approach also helps prevent a common scope problem: using the phrase “LOD 350 model” without defining which disciplines, elements or areas actually require LOD 350. A clearer scope identifies the relevant model elements and ties their development level to a specific design, documentation or coordination purpose.
How point clouds and deliverables affect Revit LOD for as-built models
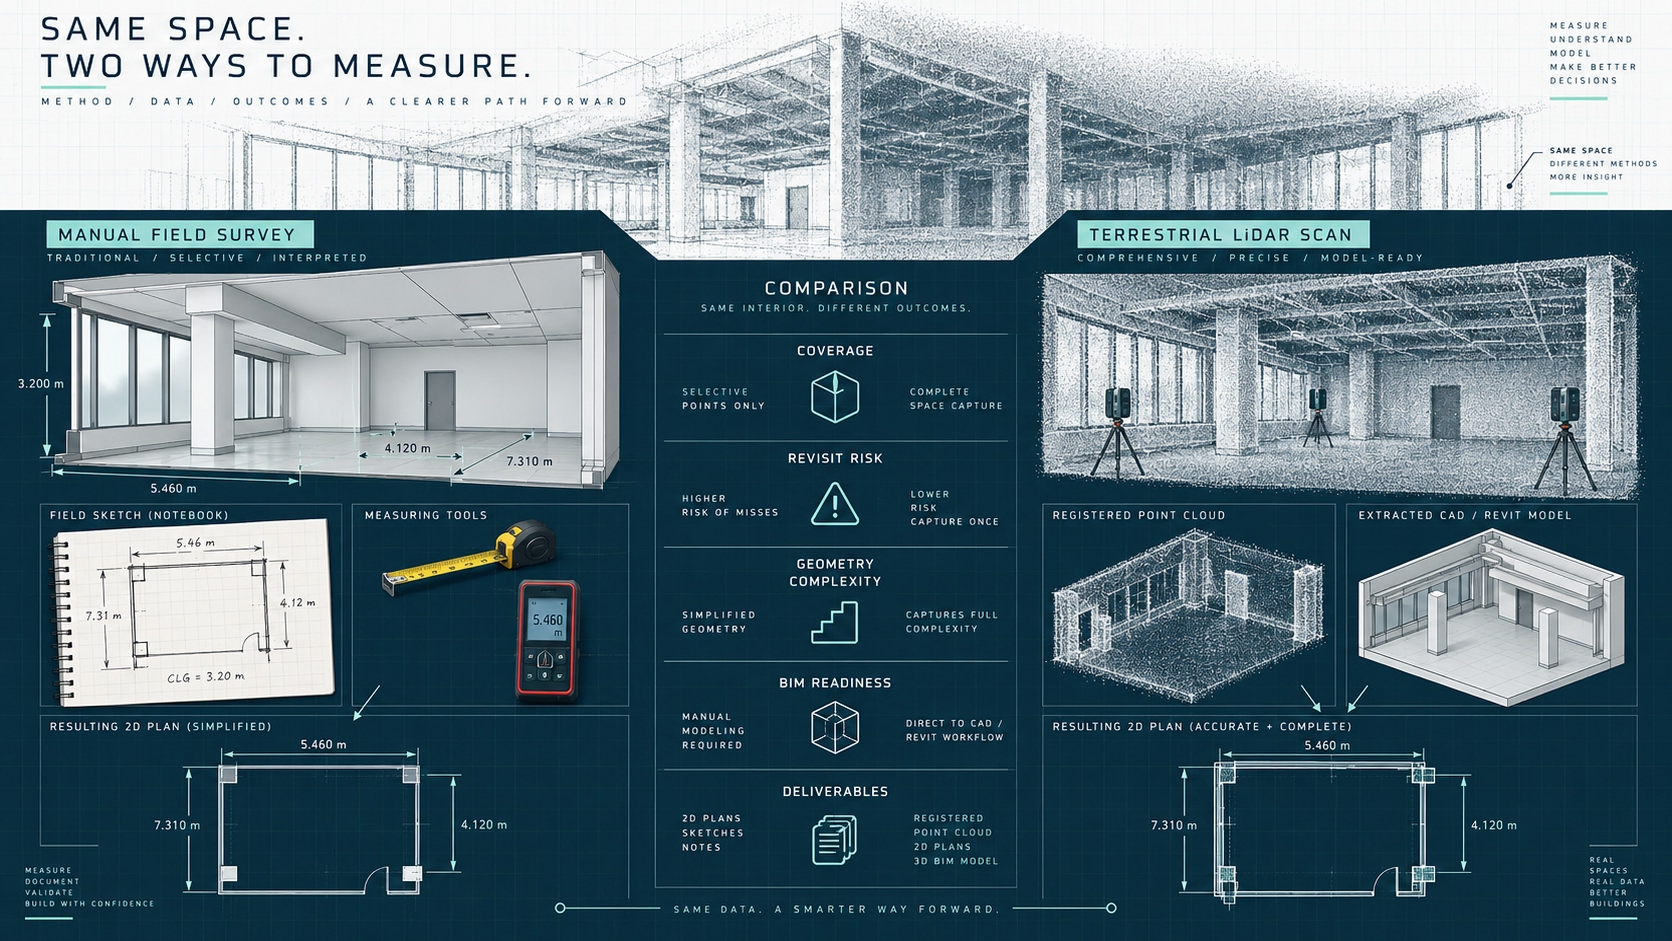
The requested LOD should be coordinated with the underlying reality-capture workflow and the final deliverables. In Scan-to-BIM projects, 3D laser scanning creates point cloud data representing existing building conditions. The point cloud then acts as the measured reference from which selected building elements are developed in Revit.
Define what must become a Revit element
Not every visible condition in a point cloud needs to become a separate BIM object. The project scope should state which walls, floors, ceilings, structural elements, openings, equipment or MEP components must be represented. This prevents modelling effort from being spent on objects that will never influence the design or construction workflow.
Define the deliverables separately from LOD
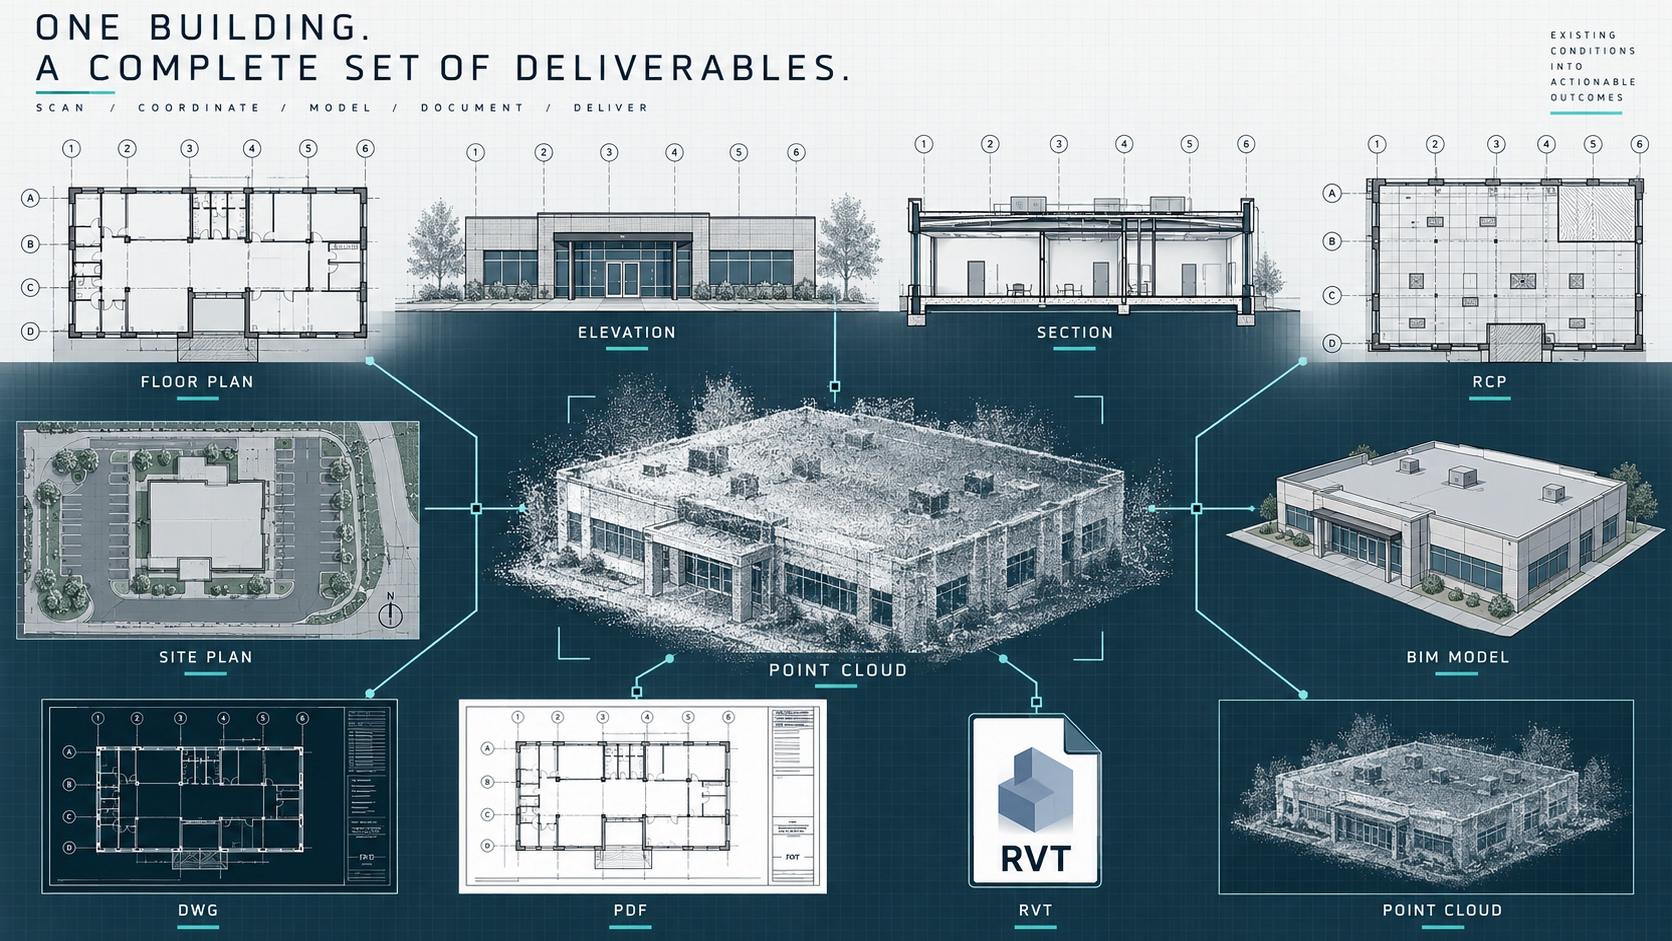
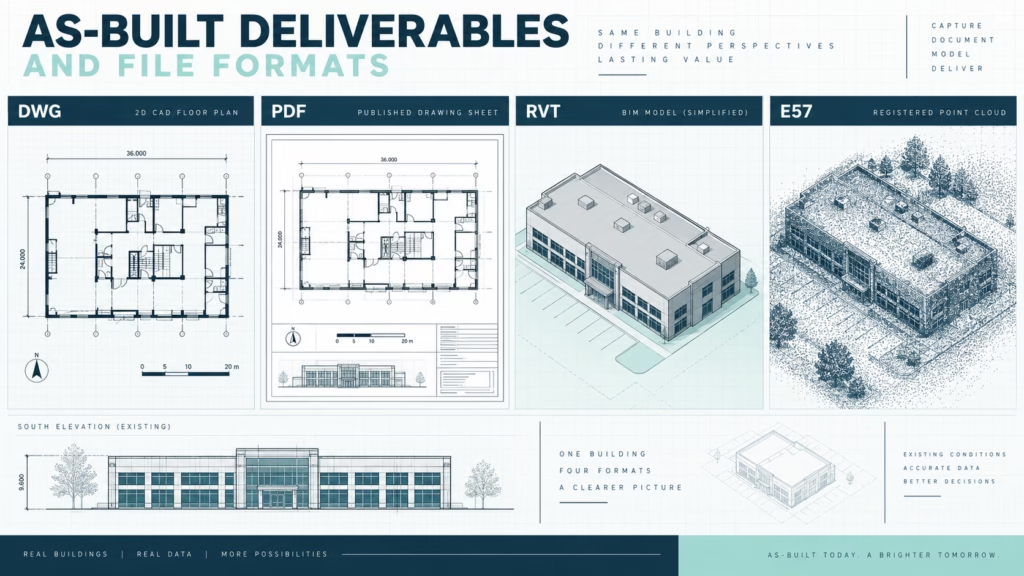
LOD and file format solve different problems. A client may need an RVT model for design, DWG drawings for CAD workflows, PDF drawings for accessible review and a registered point cloud as the underlying measured reference. The required package can also include floor plans, elevations, sections, reflected ceiling plans or other defined existing-condition views.
- RVT for editable Revit/BIM workflows.
- DWG for CAD-based design and coordination.
- PDF for review, field reference and distribution.
- Point cloud data for direct access to captured existing-condition geometry.
- Floor plans, elevations, sections and reflected ceiling plans when those views are part of the project scope.
Revit LOD for as-built models and the final file package should therefore be specified separately so that model development and deliverable format each match the downstream workflow.
Choosing Revit LOD for as-built models by project type
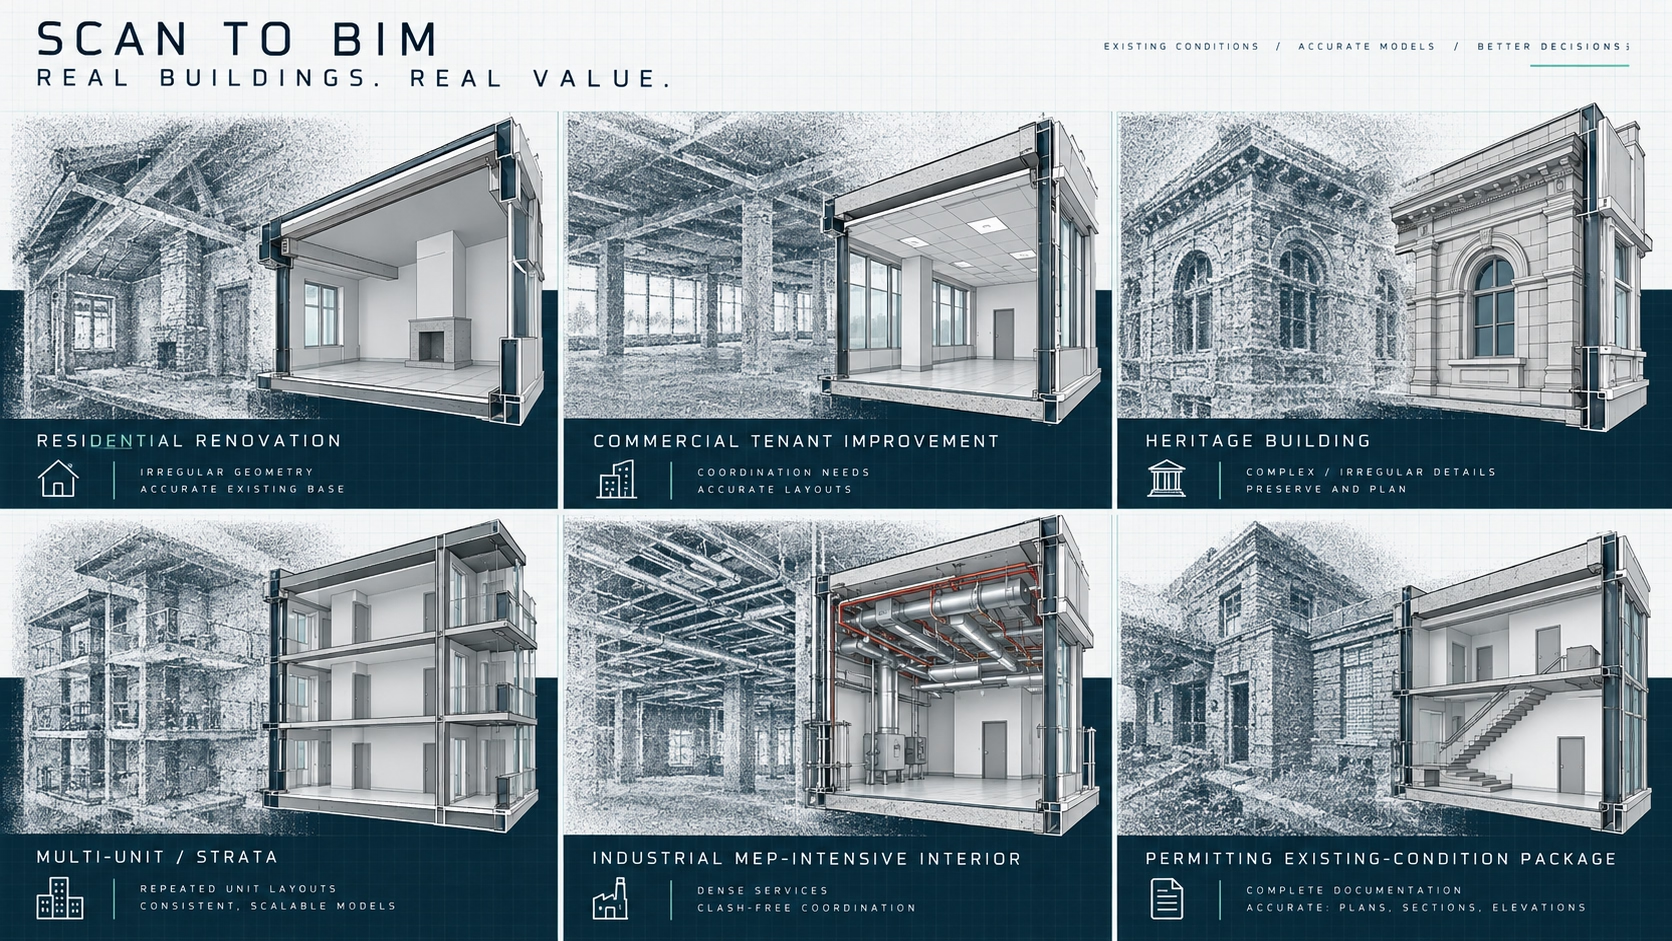
Residential renovations
Residential renovations often benefit from LOD 300 when architects or interior designers need reliable existing-condition geometry for layout changes, additions or detailed design. LOD 200 may be sufficient for preliminary planning, while LOD 350 is more appropriate only where complex building-service or construction interfaces must be coordinated.
Commercial tenant improvements
Commercial tenant improvements frequently need LOD 300 architecture because walls, openings, ceilings and existing spatial conditions form the base for design. Where new HVAC, electrical, plumbing or ceiling systems must fit around existing services, selected areas can be raised to LOD 350.
Heritage buildings
Heritage documentation should be scoped according to the elements that matter to renovation or conservation decisions. A project may require defined LOD 300 architectural geometry for the overall building while selected complex interfaces receive additional development. LOD should not be used as a substitute for explicitly listing the elements that need to be documented.
Multi-unit and strata properties
Multi-unit properties can use different LOD requirements across suites, common areas and service zones. Repetitive spaces may not require the same modelling depth as plant rooms, risers or renovation areas. A zone-based scope helps keep the BIM deliverable aligned with the actual project.
Industrial facilities
Industrial renovation and retrofit projects are stronger candidates for LOD 300 to LOD 350 because equipment, building services and interfaces can dominate coordination. LOD 350 is particularly relevant in areas where existing systems, supports or connections influence the placement of proposed work.
Permitting workflows
Existing-condition BIM can support the design information used to prepare permit documentation, but the required LOD depends on the design team’s needs rather than the word “permit” alone. LOD 300 may provide a suitable base for many renovation workflows, while more detailed coordination can be limited to project-critical zones.
Across these project types, Revit LOD for as-built models should be matched to the areas and disciplines that actually influence design or construction decisions.
What to specify for Revit LOD for as-built models
A useful Scan-to-BIM brief should define the intended use before specifying a LOD number. The modeller needs to understand which project decisions the Revit model must support, which disciplines are included and what outputs the downstream team expects to receive.
- Project purpose: State whether the model supports feasibility, design, renovation, coordination, construction planning or long-term documentation.
- LOD by discipline: Define whether architecture, structure and MEP require the same or different development levels.
- LOD by zone: Identify renovation areas, plant rooms, ceiling spaces and other locations requiring additional coordination detail.
- Model elements: List the building components that must be represented in Revit.
- Interfaces: State whether supports, penetrations, connections or adjacent-system relationships are required.
- Deliverables: Confirm RVT, DWG, PDF, point cloud and required drawing views.
- Existing data: Provide available drawings or BIM files and identify whether they are reference information or expected to be verified against site conditions.
- Downstream users: Confirm whether architects, engineers, contractors, owners or facility teams will use the final files.
The MeasureBuilt approach
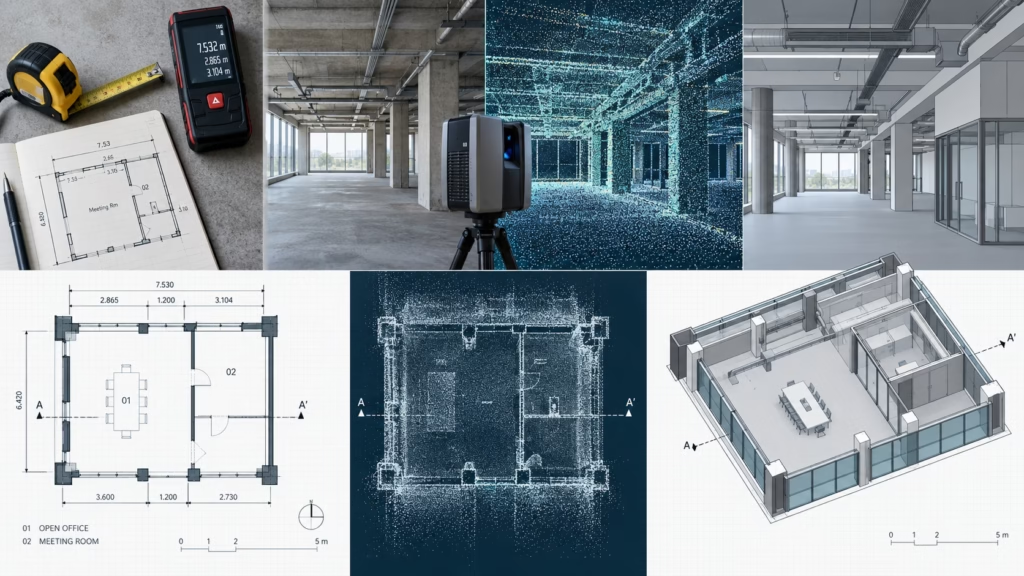
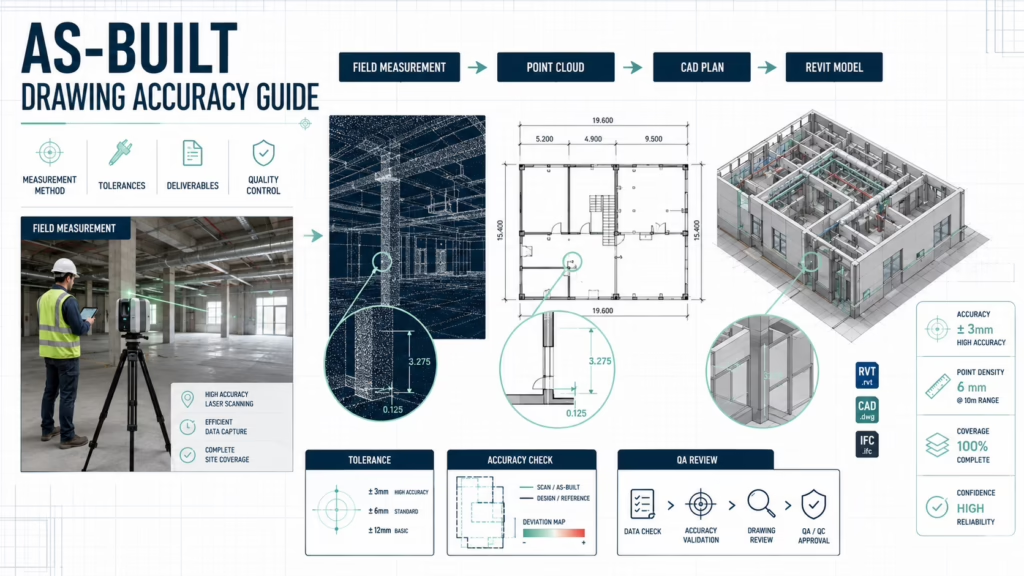
MeasureBuilt structures existing-condition documentation as a practical workflow: site measurement and 3D laser scanning, point cloud processing, conversion into the required drawings or Revit model, quality review and delivery in agreed formats such as DWG, PDF and RVT.
For projects across Greater Vancouver and the Lower Mainland, the modelling scope can be matched to the intended use instead of automatically applying the highest development level to every element.
Why an as-built model does not automatically need LOD 500
The term “as-built” and the LOD designation should not be treated as interchangeable. LOD references commonly describe LOD 500 as a field-verified as-built or facility-management state, but many Scan-to-BIM projects are commissioned to create an existing-condition design base rather than a fully developed LOD 500 asset model.
An architect preparing a renovation may need LOD 300 architecture and selected LOD 350 coordination areas even though the model is based on measured existing conditions. Requiring LOD 500 across the entire building would define a different and broader modelling objective.
In short: Describe what the model must contain and what decisions it must support. The phrase “as-built Revit model” alone is not a complete LOD specification.
The best Revit LOD for as-built models is the level that supports the next project decision without adding unnecessary modelling scope. LOD 200 works for approximate context, LOD 300 is a strong fit for many renovation and design workflows, and LOD 350 is most valuable where connections, interfaces and multidisciplinary coordination affect constructability. For complex buildings, a mixed LOD strategy can be more useful than assigning one development level everywhere. Request a quote at measurebuilt.com/request-a-quote to get a fixed price and timeline for your as-built survey.
FAQ
What LOD is usually best for an as-built Revit model?
LOD 300 is often the practical starting point for an as-built Revit model used for renovation, design and existing-condition documentation. It provides more defined geometry than LOD 200 without automatically requiring the interface and connection modelling associated with LOD 350. The final choice should still be based on the elements, disciplines and project zones that the design or construction team actually needs.
What is the main difference between LOD 300 and LOD 350?
LOD 350 adds coordination-relevant interfaces and connections to the more defined element geometry associated with LOD 300. This makes LOD 350 useful when adjacent systems, supports, penetrations or connections affect constructability. If the team only needs reliable architectural geometry for design and documentation, LOD 300 may be sufficient.
Is LOD 350 required for every Scan-to-BIM project?
No. LOD 350 is most useful when construction coordination depends on detailed relationships between elements. Many renovation projects can use LOD 300 for most architectural geometry and reserve LOD 350 for mechanical rooms, congested ceiling zones or other coordination-critical areas. A mixed LOD specification can therefore be more efficient than modelling the entire property to LOD 350.
Can one Revit model contain different LOD levels?
Yes. Different disciplines, elements or building zones can be assigned different development requirements when the project scope supports that approach. Architecture may be developed to LOD 300, selected MEP areas to LOD 350 and background areas to LOD 200. The important step is documenting those requirements clearly before modelling begins.
Does a higher LOD mean the survey itself is more accurate?
Not necessarily. LOD defines how model elements are developed and what information or interfaces they represent. The survey workflow and captured site data are separate parts of the project scope. A highly developed model should still be based on appropriate existing-condition information, and additional modelling cannot replace missing site data.
Does an as-built Revit model have to be LOD 500?
No. LOD 500 is commonly associated with a field-verified as-built or facility-management state, but many existing-condition Scan-to-BIM projects are created as design and coordination bases. Those projects may use LOD 300, LOD 350 or a mixed LOD specification depending on how the model will be used.
What should be included in a Revit LOD scope?
The scope for Revit LOD for as-built models should define project purpose, disciplines, modelled elements, development level by zone where necessary, required interfaces and final deliverables. It should also identify whether the client needs RVT, DWG, PDF, point cloud data, floor plans, elevations, sections or reflected ceiling plans. A clear element-by-element scope is more useful than requesting a LOD number alone.

Analyse this page with AI
Want a summary, fact-check, or an RFP template built around these measurement standards? Send this page directly to your favourite AI model.
Content and prompt will be copied to clipboard for some models.